


Cross-country horse riding for beginners: How to get into the sport
If you’re interested in getting involved in the world of eventing, you’ll need to be able to thrive in cross-country horse riding. While the discipline can be demanding, it’s also one of the most exciting activities that you and your horse can perform together.
Before you take your first steps into cross-country riding, it’s important that you grasp the basics of the discipline, including the rules and what to expect. Here, we’ve put together a beginner’s guide that will introduce you to the essentials of the discipline. We will cover:
- What is cross-country horse riding?
- What are the cross-country riding rules?
- What are the cross-country levels?
- What is a cross-country course?
- What are the types of cross-country jumps and fences?
- Cross-country outfit, tack, and colours: What clothes and equipment do I need?
- Cross-country horse-riding tips for beginners

What is cross-country horse riding?
Cross-country horse riding — sometimes referred to as just cross-country, “XC” or as Hunter trials — is an equestrian sport that sees rider and horse tackling a long course with jumps and other obstacles designed to simulate riding at speed across the countryside. It is one of the disciplines contested during eventing, along with dressage and showjumping.
The event is a test of the speed, endurance, and jumping ability of the horse, as well as obedience and conditioning. An expert cross-country rider will need to demonstrate their knowledge of pace and ability to ride technically for extended distances. As the rider and horse compete at higher levels, the courses will become more difficult, with higher, trickier fences and greater distances to tackle.
Affiliated vs unaffiliated cross-country riding
In the UK, official cross-country riding only sees competition at events that are run by British Eventing. When someone refers to “affiliated” cross country, they are talking about an event that is sanctioned and organised by British Eventing.
Cross-country riding works a little differently to other eventing disciplines in that affiliated competitions don’t take place outside of eventing, where all three sports are contested during a single competition. While British Dressage and British Showjumping control each of their individual sports, affiliated cross-country does not take place outside of meet-ups organised by British Eventing. This guide will therefore refer to the levels and rules used by British Eventing.
What is a hunter trial?
While affiliated cross-country riding takes places at British Eventing competitions, that’s not to say there aren’t unaffiliated, standalone events. These are generally known as hunter trials and consist of individuals or pairs competing across a longer course in much the same way as the cross-country phase in eventing. The rules for each competition can differ from organiser to organiser.
These are purely cross-country events and you won’t find riders expected to then ride dressage or perform showjumping. However, many eventing riders who want to practise the cross-country phase will enter and compete in hunter trials.
British Eventing membership
To compete in affiliated cross-country riding at events, you will need to become a member of British Eventing. There are a few options:
- Full Rider Membership: Allows you to enter unlimited events through the eventing season (March to October) and gives you priority entry to balloted events.
- Supporter Membership: Allows you to enter a limited number of events through a season by purchasing Day Passes. You receive more member benefits than with Day Pass Membership.
- Day Pass Membership: Allows you to purchase Day Passes for events in the season. You receive fewer member benefits than with a Supporter Membership.
For a more in-depth look at the British Eventing membership levels, please read our eventing guide.
What are the cross-country riding rules?
The aim of cross-country riding is to make it around the course with as few penalties as possible and within a fast yet safe time, and the rules reflect this. For each course, there is:
- An optimum time: This is the ideal length of time it takes to safely complete the course.
- A time limit: This is double the optimum time and any time over this is deemed an unacceptable amount of time taken to complete the course.
Each competitor is timed from the moment they cross the start line to when they reach the finish, with time penalties added for each second over the optimum time. In addition, to encourage safe riding, there are time penalties for coming in well under the optimum time. The optimum time is calculated by dividing the length of the course by the pace required at each of the British Eventing levels, as defined in the Members’ Handbook.
There are also a few jumping faults that will result in penalty points:
- A refusal: If the horse stops when faced with an obstacle.
- A run-out: If the horse avoids passing its body over the obstacle.
- A circle: A horse can circle/cross its tracks around an obstacle without penalty provided it has not already jumped the next one. For obstacles with several elements, the horse will be penalised if it passes around the back of any element or crosses its tracks between them.
The penalties for each fault are:
| Fault type | Penalty |
| Refusal, run-out, or circle at an obstacle | 20 points |
| Second refusal, run-out, or circle at the same obstacle | 40 points |
| Third refusal, run-out, or circle at the same obstacle | Elimination |
| Third refusal, run-out, or circle across whole course (Novice level and above) | Elimination |
| Fourth refusal, run-out, or circle across whole course (BE105 level and above) | Elimination |
| Fall of rider anywhere on course | Elimination |
| Fall of horse anywhere on course | Elimination |
| Riding the wrong route | Elimination |
| Missing an obstacle altogether | Elimination |
| Jumping an obstacle twice | Elimination |
| Jumping an obstacle in the wrong direction | Elimination |
| Every second over the optimum time | 0.4 points |
| Every second in excess of 15 seconds under the optimum time | 0.4 points |
| Exceeding the time limit (double optimum) | Elimination |
The winning horse/rider is therefore the non-eliminated team with the fewest penalty points. It’s also important to remember that cross-country takes place in combination with dressage and showjumping as part of an overall event. The penalty points from this phase are combined with the ones picked up elsewhere to see where you place in the entire competition.
As cross-country courses are longer in length and have more obstacles than showjumping courses, more than one rider may be completing the course simultaneously. Often, riders will start in a staggered fashion, sometimes in pairs, so it may be the case that several riders are moving through the same part of the course.
Because this presents a new element of hazard and the potential for other riders’ performances to be affected, there are specific rules when riding with other competitors:
- If a rider’s progress is hampered to the point it may hold up another rider, they must hold back until it’s safe to recommence.
- Competitors that are held up will have their time stopped until they can move again.
- If a rider fails to stop when told to on the course, they will be eliminated.
- If a rider deliberately obstructs the route of an overtaking rider, they will be eliminated.
- If a rider overtakes another horse unsafely, they will be eliminated.
Note: British Eventing’s rules are more expansive than the summary provided in this guide, and they are updated annually. Therefore, it’s best to refer to their Member’s Handbook for the fullest and most up-to-date guidance.
What are the cross-country levels?
Affiliated cross-country is only contested as part of eventing competitions, so the levels and how you progress through them follow the British Eventing model.
For each of the ten British Eventing levels, there is a set difficulty required for the cross-country phase of the competition. As levels increase, the courses become longer, harder, and more diverse. You can expect a greater quantity of jumps that are higher and more varied in their design and placing, as well more distance to be covered at a faster pace.
Here’s what to expect from the cross-country course at each of the British Eventing levels:
| British Eventing level | Cross-country course specification | |||||
| Length | Pace | Number of jumps | Max jump height | Max jump drop | Max depth of jump into water | |
| BE80 | 1600–2800m | 435m/min | 18–25 | 80cm | 120cm | N/A |
| BE90 | 1600–2800m | 450m/min | 18–25 | 90cm | 130cm | N/A |
| BE100 | 1800–2800m | 475m/min | 18–25 | 100cm | 140cm | 20cm |
| BE100 Plus | 1800–2800m | 475m/min | 18–25 | 100cm | 140cm | 20cm |
| BE105 | 2000–2800m | 500m/min | 20–27 | 105cm | 140cm | 30cm |
| Novice | 2000–2800m | 520m/min | 20–28 | 110cm | 160cm | 30cm |
| Intermediate Novice | 2000–2800m | 520m/min | 20–28 | 110cm | 160cm | 30cm |
| Intermediate | 2600–3620m | 550m/min | 26–32 | 115cm | 180cm | 30cm |
| Advanced Intermediate | 2600–3620m | 550m/min | 26–32 | 115cm | 180cm | 30cm |
| Advanced | 3250–4000m | 570m/m | 30–40 | 120cm | 200cm | 35cm |
Note: The BE100 Plus, Intermediate Novice, and Advanced Novice are levels intended to give the rider a taste of the next full level up. The events in these categories have tougher showjumping and dressage phases but retain the cross-country standards of the current level.
The BE80 and BE90 have no requirements so they can be entered when you feel that you are ready to step up. To progress through the British Eventing levels beyond BE100, you will need to earn Minimum Eligibility Requirements (MERs) in competitions, which are attained by achieving a result with:
- Not more than 50 penalty points in dressage
- Not more than 16 penalties in showjumping
- Zero cross-country penalties and not more than 30 cross-country time penalties
Each level has a minimum number of MERs you need to have earned from a level below it before you can compete. BE100 Plus, Intermediate Novice, and Advanced Novice can be tried at any time provided the rider meets the requirements for the level before them. Here are the MER minimums for each subsequent level:
- BE100: Must have two MERs at BE90
- BE100 Plus: Must have two MERs at BE90
- BE105: Must have two MERs at BE100 or BE100 Plus
- Novice: Must have three MERs at BE100, BE100 Plus, or BE105
- Intermediate Novice: Must have three MERs at BE100, BE100 Plus, or BE105
- Intermediate: Must have five MERs at Novice
- Advanced Intermediate: Must have five MERs at Novice
- Advanced: Must have five MERs at Intermediate
Note: Some levels have certain other requirements to do with age or alternative qualifications — please refer to British Eventing’s Members’ Handbook.
What is a cross-country course?
A cross-country course is a route and set of obstacles a horse and rider must follow when they are competing in the cross-country phase of an event. For British Eventing competitions at the National level, course lengths will range from 1600–4000m and there will be between 18–40 jumps, with the exact amount depending on the level of competition.
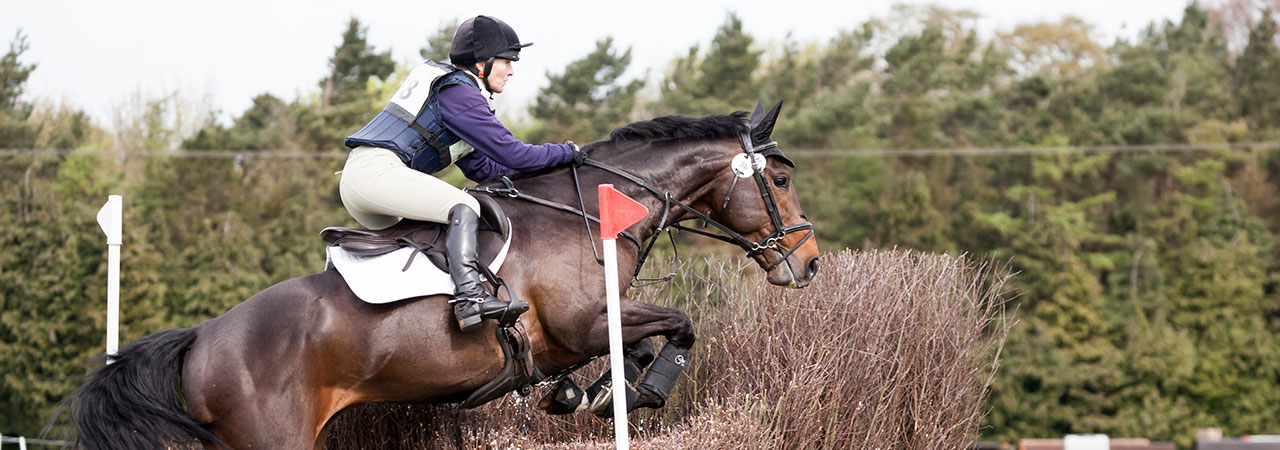
Every obstacle in the course is numbered to show its position in the pre-determined jumping order, as well as having a red flag (on the right) and white flag (on the left) that indicate what direction it needs to be approached from. A black stripe on the red flag indicates that an obstacle is optional, so another route can be taken without the rider being penalised.
Cross-country course design
Each cross-country course is created by a course designer, who specialises in making the route a suitable test for those taking part. For example, courses for novice riders and horses may use terrain to naturally prepare and lead up to a jump, while an advanced course may see a jump positioned on a slope to make it more challenging. Designers will always try to create a test that is fair and examines the rider and horse at the correct level.
The majority of cross-country courses are located outdoors and run through fields and wooded areas to accurately represent the terrain of riding in the country. In most cases, the course will incorporate the natural features of the area to reflect the fact that this is the type of countryside found in that particular region. Therefore, expect to find flatter courses in low-lying regions and more slopes if the event is held in a hilly region.
Each course has a start box, which is a small area where the horse and rider wait for the signal to commence their ride. Typically, the first fences in the course will be fairly unchallenging, allowing the horse to find its stride and focus before moving into more technical obstacles. The difficulty tends to ease off towards the end of the course again so the horse can gain speed and finish well.
What are the types of cross-country jumps?
There is a wide variety of cross-country jumps available to course designers, ranging from natural obstacles, like a tree trunk, to man-made obstacles, like a tyre fence. Some factors affecting a jump’s difficulty include its height, width, and design, as well as its proximity to other fences and where it’s placed within the terrain. Unlike showjumping, most cross-country obstacles are solid in their design, though some are designed to collapse for safety and scoring reasons.
Here are some of the most common cross-country jumps and obstacles:
- Log fence: A log fence is an obstacle of a single horizontal tree trunk or an arrangement of multiple. This is the most common cross-country jump and can be used to create fences of various sizes and widths. Horses tend to jump these fences quite well, with many people believing it’s because of their natural appearance.
- Corner: Corner fences are triangular in shape and require the horse to jump over one corner, an action that requires practice to master without the horse running out. At more advanced levels, the width of the corner can be increased and several can be placed in close proximity to enforce a curve.

- Angled fence: An angled fence is a post and rail jump that is placed at an angle, rather than head on. This makes it more of a challenge to jump as the horse could more easily run out.
- Bounce: A bounce is a combination of single fences that are arranged at a close distance so the horse can’t take a whole stride in-between but cannot jump them both in one leap, either. As a result, the horse has to land then immediately take off again to clear the next fence.
- Gate: A gate is a fixed wooden fence that is typically in the style of a countryside gate. The fence can be increased in difficulty with more height or through positioning.
- Wall: A solid wall topped with a wooden beam. Difficulty can be increased by adding more height, an angled approach, or choosing a challenging position on the course.
- Coffin: The coffin is a combination fence with three elements: a jump, a ditch, and a final jump. The difficulty can be boosted by increasing the height, width, and depth of each of the elements.

- Water: A water obstacle can be a natural stream or man-made, and a horse will be required to either splash through (lower levels) or jump in and out. There may even be a fence that needs to be jumped while in the water. Depth will range between 20–35cm at British Eventing National levels, increasing as the rider becomes more advanced.
- Palisade: A palisade is a fence that slopes upwards at roughly a 45 degree angle towards the direction the horse needs to jump it. A ditch can be added to the front of the palisade to increase the difficulty.
- Steps: A set of steps that must be jumped by the horse. The difficulty can be increased by increasing the height of the steps and the distance between each one. Fences before or after the obstacle can also be added to increase the challenge.
- Brush fence: A brush fence consists of a solid base and some brush placed on top. A horse should jump through the brush in a flat jump rather than trying to clear the obstacle with a rounded arc. Fences are often placed low so that the horse can see through the brush.

- Tyre fence: Tyres that have been linked to form a jumping obstacle. Difficulty can be increased by upping the height, adjusting the angle, or adding more fences.
- Roll top: A jump with a rounded, half-barrel top. The curve often makes the jump more inviting to the horse, so it is not considered a “scary” fence. The height and width of the fence can be adjusted for difficulty.

- Table: A table jump consists of four legs and a solid top, giving it height and width. A horse should try to clear the table in one go, but the table will be strong enough to hold its weight should it fall short. Tables are typically built to be more elevated at the back so the horse can see there is width to it.
- Trakehner: This obstacle consists of a ditch with a fence over it, usually a log or a rail. The fence can be placed straight across or at an angle for variation. For the horse, these jumps can be intimidating, so they’re often used to test bravery.

- Arrowhead: A triangular jump where the point is facing downwards, resulting in quite a narrow fence. As there is no ground line, it can be difficult for the horse to judge the jump and a run-out may occur. These fences are often used in combination with other obstacles to test how quickly horse and rider can regain their composure.
- Stile: A stile is a narrow fence, often designed to look like a traditional country style. Due to its tighter clearance, it requires focus from horse and rider for a successful jump.


How should I walk a cross-country course?
Before you participate in the cross-country phase of an event, you will have the opportunity to view a plan of the course and to walk it. Walking the course is an essential part of your preparation before riding it, as it allows you to see in person what’s in store and to formulate a plan for each jump.
When you walk the course, there are several things you should look out for. These are:
- Types of fences: A plan can tell you what fence types to expect, but you really need to see them in person to decide on your approach. Some obstacles, like coffins, need a slower, more methodical approach than basic fences, like log fences. Optional fences should also be planned for during your walk.
- Footing: The condition of the ground on the course is known as the footing, and you’ll need to take note of it. Courses never purposely use poor footing as an obstacle, but it’s best to go out and look for boggy or uneven patches that need to be avoided on your ride.
- Light and dark areas: Areas where there is a quick transition between light and dark, such as emerging from woods or shadows, need to be noted. A horse’s eyesight does not adjust quickly to light levels, so you need to pay more attention to these areas.
- Terrain: The course will likely have some natural changes in terrain, with parts that go uphill and downhill, as well as man-made drops after fences. Jumps that take place in sections like this need a particular type of ride to adjust to them, so it’s worth taking note.
- Line: The line you take is the exact route you’re going to follow over an obstacle. You need to consider the line you’ll take over each jump, paying particular attention to combinations that need a change of direction or are very narrow to ensure you approach them correctly.
- Striding: Your horse’s striding is the number of strides it needs to cover a distance. This is very important to consider between obstacles, particularly combinations that are in close proximity. You will have to manage your horse’s stride in these situations, lengthening or shortening it when necessary.
- Openness: Areas with open space, like fields, will encourage forwardness in a horse, while enclosed areas, such as a wooded track, will make them more cautious. You will need to bear this in mind, especially if you need to keep a pace or clear a tough obstacle.
- Layout of the course: It’s worth taking note of any details of the course’s layout that may aid you. For instance, if there is a section that is designed for speed at a gallop, with lots of space and low jumps, it’s a good place to make up lost time from a slower, more technical section. If you know what’s coming up, you can adjust your ride to take advantage.
- Problematic obstacles: Look for any obstacles that you know your horse has trouble with. When you know these are coming up, you can ride with extra confidence and keep more contact with your horse to reassure them and give extra impetus.
- Distractions: Look out for any spots on the course that may be a distraction to your horse’s performance, such as nearby livestock, flapping flags, or areas that pass near to spectators.
Cross-country outfit, tack, and colours: What clothes and equipment do I need?
Like showjumping and dressage, cross-country has rules on what you need to wear and what tack is necessary for your horse. While appearances are not as important as in other phases, British Eventing still has certain requirements that must be met, though there is more focus on rider and horse safety owing to the demanding nature of the cross-country riding.
Cross-country clothing and colours
As a British Eventing competitor, you’ll need to follow these rules for dress in cross-country events:
- Riding helmet: A traditional peaked riding helmet is unsuitable for cross-country. Instead, you will need a jockey-style skull cap that has no peak. It may only have smooth, rounded protrusions at the front no greater than 5mm. It must meet the safety criteria set out in the British Eventing Handbook. A removeable hat cover with a flexible peak is allowed.
- Body protector: A body protector must be worn at all times during cross country. It must be British Equestrian Trade Association (BETA)–approved and manufactured in 2009 or later. Your body protector shouldn’t impede your flexibility or balance.
- Sweater or shirt: Either a sweater or shirt should be worn, advisably with long sleeves.
- Breeches: Plain white, buff, or fawn breeches are required for cross-country.
- Riding boots: Plain black boots or full-grain smooth leather gaiters and matching boots must be worn.
- Numbers: Your rider number must be worn and clearly visible from both the front and back.
There are also a few optional items you’re permitted to wear:
- Gloves
- Spurs: Must meet the regulations in the British Eventing Handbook.
- Whip: Must meet the regulations in the British Eventing Handbook.
- Inflatable/air jacket: Must be worn over top of the permitted body protector.
Choosing your colours
When it comes to colours for your outfit, the cross-country phase provides a lot more freedom of choice than dressage and showjumping. The general idea of choosing a colour scheme and pattern is to be as individual as possible so that you stand out from other riders and are more visible to judges and approaching riders on the spread-out country course.
There are a few tips that can make your first time choosing colours as easy and painless as possible:
- Start with your body protector: A body protector will likely be the most expensive item you buy, so it’s best to start with one that you like and build the rest of your colours from there. Standard colours, like navy, black, and green, are generally cheaper, and patterns are pricier.
- Choose a common base colour: If you plan on buying “off the peg” items, try to stick to a more common base colour that you can easily match the rest of your outfit to. If you want an unusual outfit that matches, you may need to pay for bespoke clothing to be made.
- Consider what suits your horse: It’s worth thinking about what colours will look good on the horse you’ll be riding cross-country. Generally speaking, reds and pinks don’t go well with chestnuts, and pale shades look the part on dark horses. Traditional riding colours tend to look good on almost any horse.
Cross-country tack
There are also rules about what tack you can use on your horse in the cross-country phase of British Eventing competitions:
- Saddle: An English or continental saddle with a cantle and a pommel in brown, black, grey, or navy must be used. Western-style, Iberian, Arabian, and side saddles aren’t allowed. Saddles without stirrup leathers and irons attached in the traditional way are also not allowed. A saddle pad can be used provided it’s unobtrusive and the same colour as the saddle.
- Bridle: A bridle with a bit, browband, and noseband or a normal jumping bit must be used. An American or continental gag, Pelham, hackmore, or any other bitless bridle can also be used. Double bridles are allowed with a cavesson noseband only. Bridles must be black, brown, grey, or navy in colour.
- Reins: The loop of the reins must be above the horse’s neck and the reins must be attached to the bit. You can’t use a curb rein that runs through the rings of a running Martingale or a Market Harborough. Draw, side, and running reins and chambons are not allowed.
- Martingales: Running and Irish martingales are allowed. You may also use a bib martingale. Standing martingales are not permitted.
- Tongue guards: Tongue guards are not permitted.
- Blinkers: Blinkers or any other cheek piece attachment that affects the horse’s vision are not permitted.
- Coloured stirrups: Coloured stirrups are permitted.
- Breastplate: Breastplates are permitted.
- Horse boots and bandages: Horse boots and hoof bandages can be used, but equiboots and hoofboots aren’t allowed. A body bandage or spur pad can be used.
Cross-country horse-riding tips for beginners
Now that we’ve covered the basics of cross-country as a sport, you can begin to think about getting ready for your first competitive cross-country ride, whether that’s as part of an affiliated event that also has dressage and showjumping phases, or a standalone hunter trial. In this section, we’ll share some tips to help you prepare, as well as some effective cross-country exercises.
Know what to expect at your first cross-country event
Before your first cross-country event, it’s a good idea to familiarise yourself with what to expect at the competition. At a hunter trial, you will only be riding cross-country, but when you’re eventing, it will be one phase of three (alongside dressage and showjumping). With this in mind, be sure to familiarise yourself with the schedule for the event and to work out when you will have time to prepare for each discipline properly. Each event has its own timetable and running order, often determined by whether it’s a one-day or three-day event.
When you first arrive at the event, you’ll need to find the secretary to register for the event, pay any fees, and get your hat tagged. They will also be able to provide you with any information you need about the site, as well as giving you access to the course plans for the ride(s) ahead.
It’s advisable to arrive as early as possible at the competition site, as this will ensure you have plenty of time to walk the cross-country course, which is a process that can take upwards of an hour. Make sure you know exactly what route you will be riding, decide what optional fences to take (if there are any), and pay attention to the weather and footing conditions.
When you find out when your slot will be, it’s important to remember that you could be paired with another rider depending on the format of the event and how many entrants there are. This means that you need to be prepared to ride with another competitor in close proximity if necessary, as well as being familiar with the rules for sensible riding alongside others.
When your riding slot comes around, you’ll need to make your way to the start box and wait for the course time-keeper to begin their countdown. You can’t leave this area before the timer reaches zero and you’re not allowed to have a “flying start” where you’re not moving from a standstill.
As you get underway, you will find that the course begins with easier fences, like roll-tops or logs, that will help you and your horse to establish a rhythm and build confidence. The jumps will begin to increase in difficulty and technicality in the mid-section, before becoming more manageable as the route winds to an end, allowing you to gallop at the finish.
Finally, your time will be recorded, your faults will be assessed, and your total score will be calculated by the judge.
Begin conditioning your horse
For cross-country, one of the key areas to work on is your horse’s fitness level. The sport is, after all, designed to be a test of your horse’s endurance, foremostly. This means that you will need to put in the right amount of training sessions and distance work to ensure your partner is ready to compete over the 1600–2800m course that you will experience at the most basic British Eventing level.
Improving the overall fitness of your horse is known as conditioning. If you already ride a few times a week or have already been training for dressage and showjumping, your horse may already be at, or could be on the way to being at, the base fitness level necessary for basic cross-country courses.
If you’re not sure, it’s worth bearing in mind that the ideal pace for the first level of British Eventing is 435m per minute, so if you’re not able to maintain that over the 1600–2800m required for BE80, it’s likely you’ll have to do more conditioning work. Try riding these distances with some basic jumps to see how far along you’ve progressed.
Every horse’s training starts with distance work, which is an essential part of conditioning. This will begin with walking and trotting at slow speed to improve endurance and build the fitness necessary for cantering and galloping. It’s important to build up slowly, as soft tissue injuries can occur if too much is attempted too soon. With a bit of patience, you and your partner will move up the gears.
Once your horse is able to comfortably gallop for short periods, you can begin to undertake interval training. This is the practice of working up speed to a gallop, holding pace for a while, then allowing your horse to reduce its speed and rest before galloping again. The aim of these intervals is to work up an increased heart rate, rest, and then work again before the heart rate has fully recovered to increase cardiovascular fitness with less overall galloping.
Another way to condition your horse without making them gallop for long periods is to introduce hill work into their routine. Working up an incline that is within their capabilities will work your partner harder without putting them through overly strenuous galloping that could cause injury.
There are a few considerations you need to bear in mind when conditioning:
- Be aware of ground conditions: Conditioning on ground that’s too hard can cause lameness, while heavy (wet and muddy) ground can increase the pull on tendons and cause soft tissue damage. Slippery ground can increase the risk of slipping and injury. Generally, older horses are better off on cushioned softer footing, while young horses benefit from firmer ground due to their lack of soft tissue strength.
- Increase the work rate slowly: To lessen the chance of injury and lameness, you should increase the work your horse is doing slowly. Focus only on increasing either distance or speed at one time, never both together, or you may overwork your horse.
- Learn to read your horse: When conditioning, be aware of how your horse is performing. If they are breathing or perspiring heavily or showing other signs of distress, always cut back the amount of work they’re doing and give them a breather.
- Be aware of the heat: Conditioning sessions when the weather is hot and/or humid will see your horse working harder. This means you may have to adjust the levels of their workout to account for this, as well as being extra vigilant for signs of distress.
Build cross-country bravery
When you’re training for cross-country, simple fences, like logs and rolltops can be useful when you are trying to build endurance and pace. However, your horse will get plenty of practice with simple jumps during showjumping training, so you’ll need to switch things up if you want to get your horse brave enough to comfortably handle the more complicated obstacles in cross-country.
With this in mind, you should look to incorporate the likes of ditches, banks, and water into your cross-country training sessions. By seeking out these obstacles slowly on a loose rein, your horse will have time to consider and become familiar with them. Once they are able to accept that kind of obstacle, they will have much less apprehension when approaching them at pace.
Remember to start small with any ditch, banks, or water training. Your horse is likely to stop and eye up the obstacle the first time they see it, as they’ll naturally be suspicious. Be patient and give them time to get used to the idea of crossing the obstacle, and don’t be afraid to let them circle once or twice as they look at it from all angles. Back this up with positive reinforcement as the horse gets a little bit closer — it’s another brave step for them!
The key to instilling bravery in your horse is to allow them to think for themselves while providing support and encouragement if required. It’s a much more natural process than forcing them to face a strange new obstacle quickly or forcing them when they’re afraid.
Get cross-country practice in whenever you can
While dressage and showjumping training can take place in the paddock, to get some real practice at cross-country, you will need more space and access to a variety of obstacles. As the hardest discipline to replicate, cross-country is often the weak spot in a first-time eventer’s experience and training, so it’s worth putting in some effort to improve your riding before entering affiliated events.
Depending on your location and circumstances, it may be the case that you have access to these facilities. However, if you can’t easily get access to a course, it may be worth enrolling at a cross-country riding schooling session near you, where you will get the chance to train and get advice from an experienced instructor. Before signing up for an affiliated event, you may also wish to enter some local hunter trials to practice and get to grips with the competitive nature of the sport.
Start performing cross-country training exercises
Below, you can find a few of our video tutorials to assist in improving your and your horse’s cross-country riding. You can access these and even more content by subscribing to Horse & Country.

Petplan Masterclass with Lucinda Green

Nicola Wilson Masterclass
Cross-country riding is a challenge to master, but it’s also incredibly rewarding for horse and rider. We hope this guide has given you a good overview of the sport and how to start.
You may also be interested to know that, at Horse & Country, we have a wide range of equestrian entertainment, with sports coverage, training and learning tutorials, and entertainment and documentary programmes at your fingertips. You can also stay updated with the latest news and live events. Simply subscribe to our service to access a world of equestrian programming.
Looking for our eventing masterclasses? Try here